Deploying & Securing a Webservice on Linux (Ubuntu VPS, NGINX, SSL)
Project Overview
This project demonstrates hands-on Linux server administration, security hardening (SSH, UFW), web server (NGINX) configuration, DNS management, and SSL implementation by deploying my portfolio site on a public DigitalOcean VPS.
Stack Used
- Hugo (static site generator)
- Ubuntu 25.04 (DigitalOcean VPS)
- NGINX (web server)
- Certbot (Let’s Encrypt SSL)
- UFW (firewall)
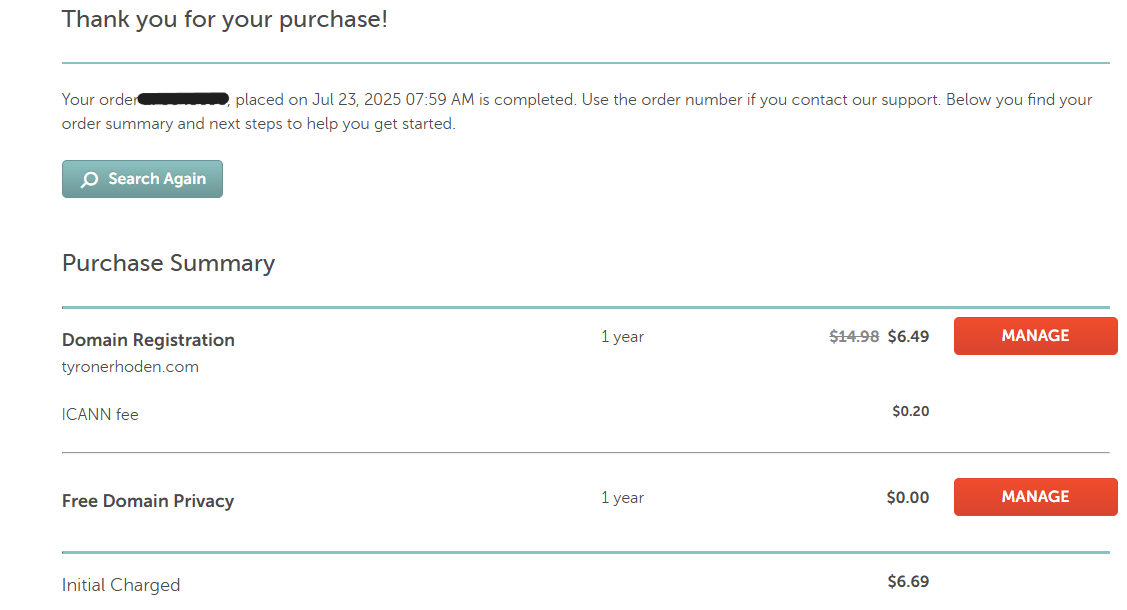
1. Bought a Domain
I purchased tyronerhoden.com to serve as my public-facing domain. You need this to attach DNS records later and issue an SSL certificate.
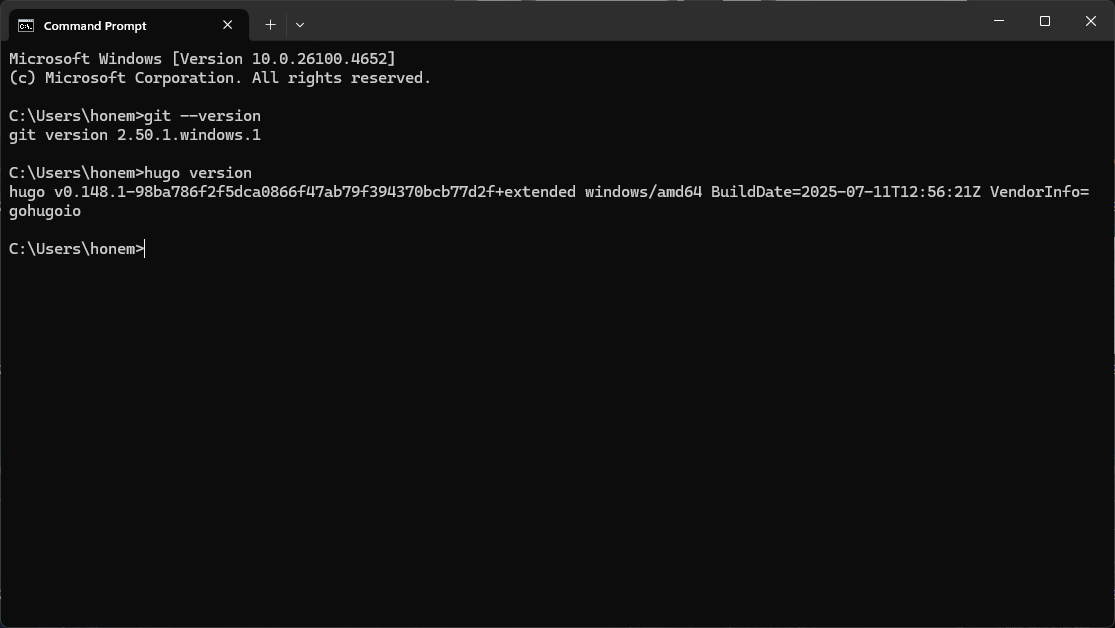
2. Installed Git and Hugo Locally
I installed Git and Hugo on my Windows machine to generate and manage my site.
git --version
hugo version
Breakdown
git --version: Confirms Git is installed.hugo version: Verifies Hugo is working, which will generate the static site.
3. Built Hugo Site and Tested Locally
I created a new Hugo project, added the void theme, and ran a local dev server to validate layout and structure.
hugo new site tyrportfolio
cd tyrportfolio
git init
git submodule add https://github.com/adityatelange/hugo-void themes/void
Done in git bash.
4. Built Static Files for Deployment
hugo
This compiled the site into the public/ directory, ready for upload to the VPS.

5. Created and Secured My VPS (DigitalOcean)
- Deployed Ubuntu 25.04 droplet
- Region: Toronto
- Plan: $5/mo basic (1 vCPU, 1GB RAM, 25GB SSD)
- Added SSH key for secure access (no password login)
ssh-keygen -t ed25519 -C "tyrone@tyronerhoden.com"
Breakdown
ed25519: Chosen for smaller key size and stronger security than RSA.- SSH key uploaded to DigitalOcean dashboard to avoid password login (best practice).

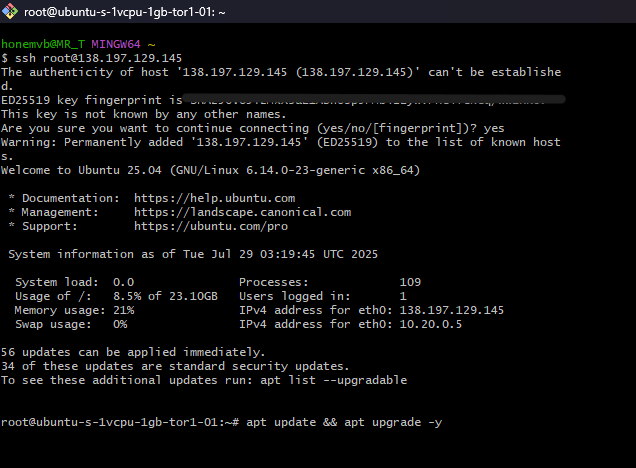
6. Connect to VPS
ssh root@138.197.129.145
7. Hardened the Server
adduser tyrone
usermod -aG sudo tyrone
Then copied SSH keys to new user:
mkdir -p /home/tyrone/.ssh
cp /root/.ssh/authorized_keys /home/tyrone/.ssh/
chown -R tyrone:tyrone /home/tyrone/.ssh
chmod 700 /home/tyrone/.ssh
chmod 600 /home/tyrone/.ssh/authorized_keys
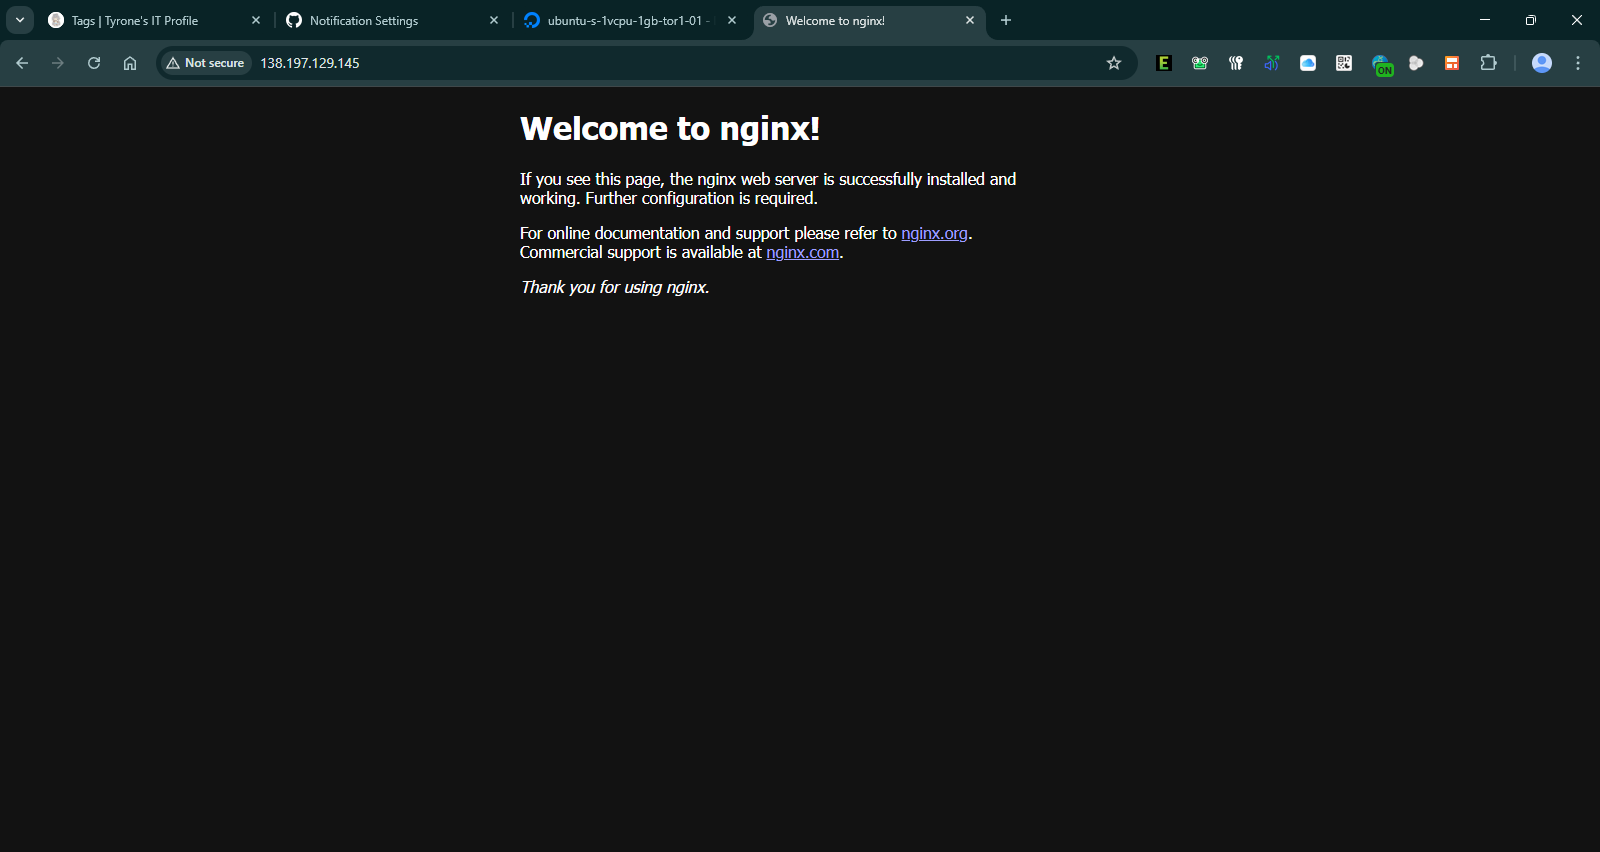
8. Installed and Started NGINX
sudo apt install nginx -y
sudo systemctl enable nginx
sudo systemctl start nginx
Visited the droplet IP to confirm NGINX was running.
9. Configured Domain and NGINX Block
Set up /etc/nginx/sites-available/tyronerhoden.com with the proper root directory and domain. Enabled it with a symlink and reloaded NGINX.
sudo systemctl reload nginx
Breakdown
10. Uploaded My Hugo Site to the VPS
scp -r public/* tyrone@138.197.129.145:/var/www/tyronerhoden.com
But I ran into permission issues:
⚠️ Error: SCP Permission Denied
❌ What went wrong:
The target directory /var/www/tyronerhoden.com was owned by www-data, blocking my scp upload.
🛠️ How I fixed it:
- SSH’d into the VPS.
- Ran:
sudo chown -R tyrone:www-data /var/www/tyronerhoden.com sudo chmod -R 755 /var/www/tyronerhoden.com - Re-uploaded with
scp. Worked perfectly.
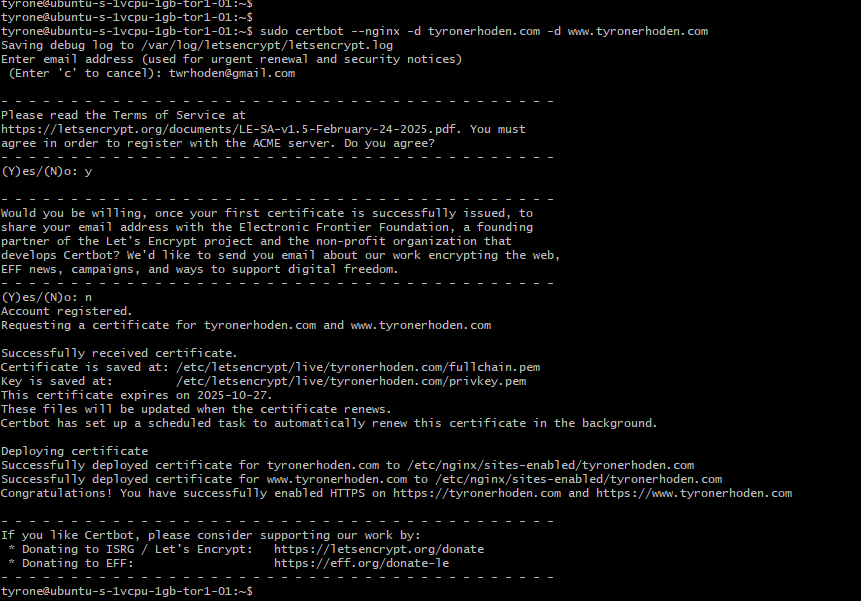
11. Enabled HTTPS with Certbot
sudo certbot --nginx -d tyronerhoden.com -d www.tyronerhoden.com
12. Final Permissions and Reload
Reset file permissions back to secure default:
sudo chown -R www-data:www-data /var/www/tyronerhoden.com
sudo systemctl reload nginx
13. Enabled UFW Firewall
sudo ufw allow OpenSSH
sudo ufw allow 'Nginx Full'
sudo ufw enable
Final Result
Fully secured, live Hugo portfolio. Hosted on an optimized, hardened Linux VPS. This wasn’t theoretical, this was a hands-on, real-world deployment.
Lessons Learned
- Server permissions will bite you if not planned
- Static site builds are fast, but full-stack web delivery still involves SSH, DNS, and SSL
- Small mistakes (like domain mismatch) compound later, so it’s better to slow down and verify early